7.5 KiB
| title |
|---|
| Split Services |
Split Services
split-services is the guided setup path for users who want to keep the
application part of the stack separate from the data part, with an optional
proxy layer in front.
The goal of this page is to help a first-time user understand what each step means and what choice they are making in the wizard.
The current split-services flow focuses on:
- writing the split stack files
- rendering the generated Compose snapshot
- building the custom image
- starting, stopping, restarting, and deleting the stack
This keeps the first version easier to understand while still making the stack layout explicit.
Think of the split-services setup as three simple parts:
Application Servicesrun the Frappe application itselfData Servicesprovide the database and Redis servicesReverse Proxyhandles incoming web traffic when you want a proxy in front
This page uses the clearer names above so the setup is easier to understand the first time you see it.
What This Setup Is For
Split services are useful when you do not want every service in one combined stack.
This is a good fit if you want to:
- keep the application layer separate from the data layer
- run the database and Redis independently from the app stack
- place a proxy in front only when you actually need it
- keep the setup readable so you can manage parts of it later
If you are new to Docker, you can think of this as splitting one big stack into smaller parts that each have a clearer job.
How The Wizard Feels
The wizard still behaves like the other easy-docker flows.
It asks one question at a time, explains what that choice affects, and then writes the stack files for you. You do not need to build the final Compose files by hand before you start.
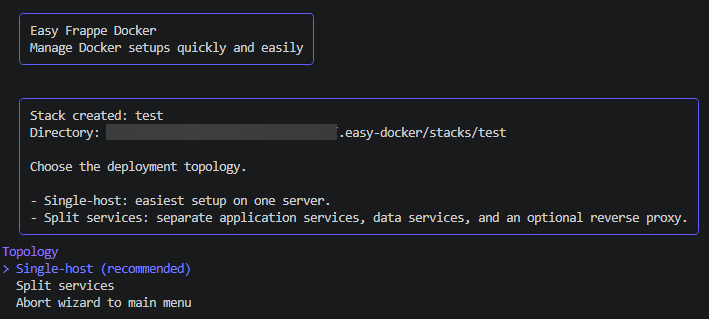
Step 1. Choose The Split Topology
When you select Split services, the wizard first explains that the stack is
being divided into separate parts instead of using one combined setup.
At this point you are not changing any service settings yet. You are only choosing the layout of the stack.
This matters because later steps will follow the same idea. If the setup is split, the wizard will ask about the application side, the data side, and the proxy side separately.
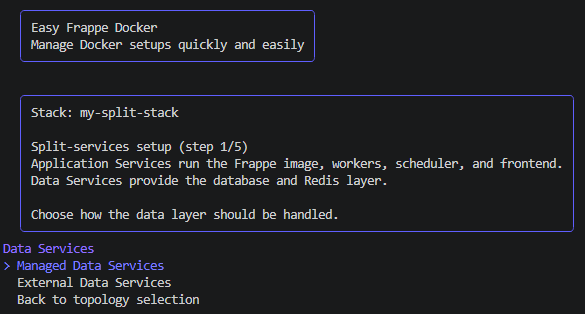
Step 2. Decide How The Data Services Should Work
The next decision is the data layer.
This is where you decide whether easy-docker manages the database and Redis
for you, or whether the stack should connect to services that already exist
elsewhere.
Managed Data Services
Choose this if you want easy-docker to create the database and Redis
containers as part of the generated split setup.
This is usually the easier choice when you are trying split-services for the first time.
It means:
- the wizard writes the data service configuration for you
- the stack can start with its own managed database and Redis services
- you still keep the data layer separate from the application layer
External Data Services
Choose this if the database and Redis are already running somewhere else.
This is more advanced, but it can be useful when:
- your organization already provides shared database and Redis services
- you want the application stack to connect to existing infrastructure
- you are splitting responsibilities across different systems
If you choose this path, the wizard asks for the required connection values and stores them in the generated stack configuration.
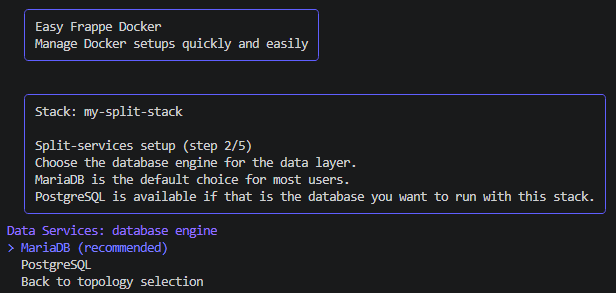
Step 3. Choose The Database Engine
After choosing how the data layer should be handled, the wizard asks which database engine should be used for the stack.
For most users, this is the simpler way to think about it:
MariaDBis the default path and usually the easiest starting pointPostgreSQLis available if that is the database you already use or want to use
If the data layer is managed by easy-docker, this choice decides which
database service will be created in the generated setup.
If the data layer is external, this choice still matters because it tells the stack which kind of database it is configured to connect to.
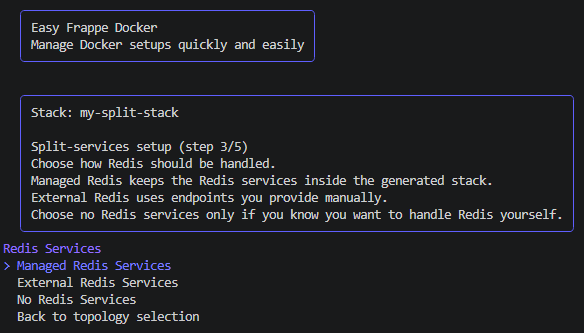
Step 4. Decide How Redis Should Work
Redis is asked about separately so the setup stays explicit.
This is useful because some users want Redis managed together with the split stack, while others already have Redis running elsewhere.
The choices are simple:
Managed Redis Servicesmeans the stack includes Redis services for youExternal Redis Servicesmeans you provide the Redis endpoints yourselfNo Redis Servicesis the advanced option when you do not want the wizard to configure Redis for this stack
The important beginner-friendly idea is that Redis belongs to the data side of the setup, even though it is asked in its own step.
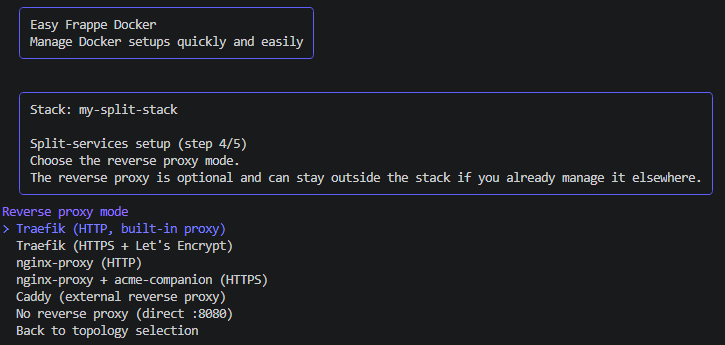
Step 5. Decide Whether A Proxy Should Be Included
The proxy layer is optional.
If you want the stack to answer HTTP or HTTPS traffic directly in front of the application services, include a proxy.
If you do not need that yet, you can skip it and keep the setup simpler.
For a first-time user, the important idea is:
- the proxy is the front door
- the application services do the actual work
- the data services keep the site data and queue state safe
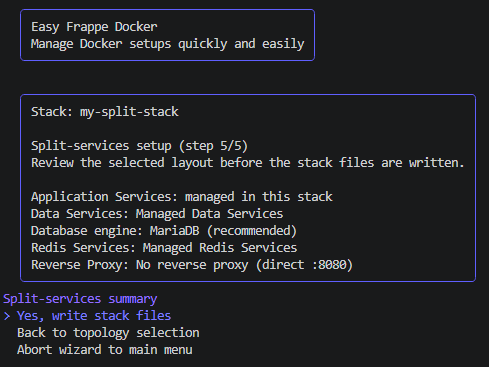
Step 6. Review The Setup Before It Is Written
Before the wizard writes the files, it shows a summary of the choices you just made.
This summary is the last chance to stop and check whether the stack is shaped the way you expected.
The summary makes the split very obvious:
- what runs as application services
- what runs as data services
- whether a proxy is included
- whether the data services are managed by
easy-dockeror external
What Happens After Setup
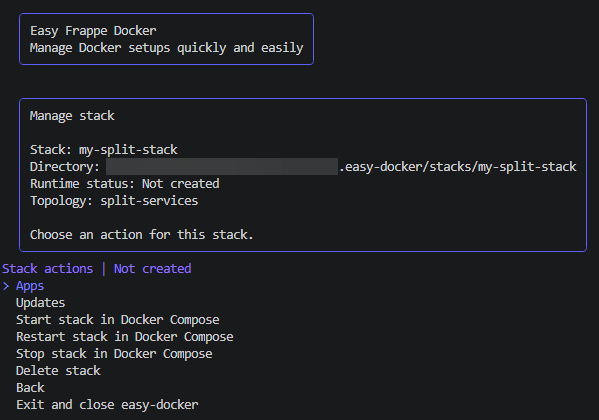
Once the split stack has been written, the generated files are stored in the
same repository-local .easy-docker area as the other wizard data.
That means you can still inspect the generated files later and continue working with them manually if needed.
After the files are written, the wizard returns to the stack management view for that split-services stack. From there you can work with the stack runtime, app selection, and update actions that are currently supported for this topology.
For split-services, the most important practical point is that the application side, the data side, and the proxy side remain easy to understand individually. If you come back later to change one part, you should not have to guess where the other parts are defined.
A Simple Mental Model
If this is the first time you use a split setup, this is the easiest way to think about it:
Application Servicesare the part you interact with most oftenData Serviceskeep the database and Redis availableReverse Proxyis optional and sits in front of the application side
You do not need to understand every Docker detail before using the wizard. You only need to know which part you want to manage separately.
Where To Go Next
After reading this page, the next useful pages are: